Uncategorized

What to Do If Your Water Damage Claim Is Denied

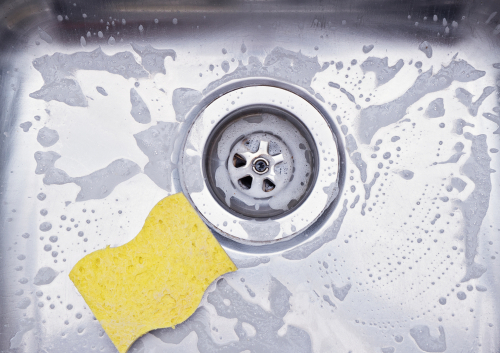
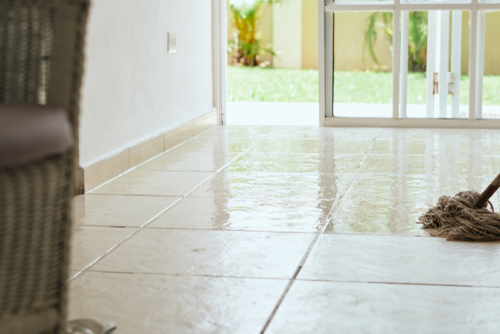
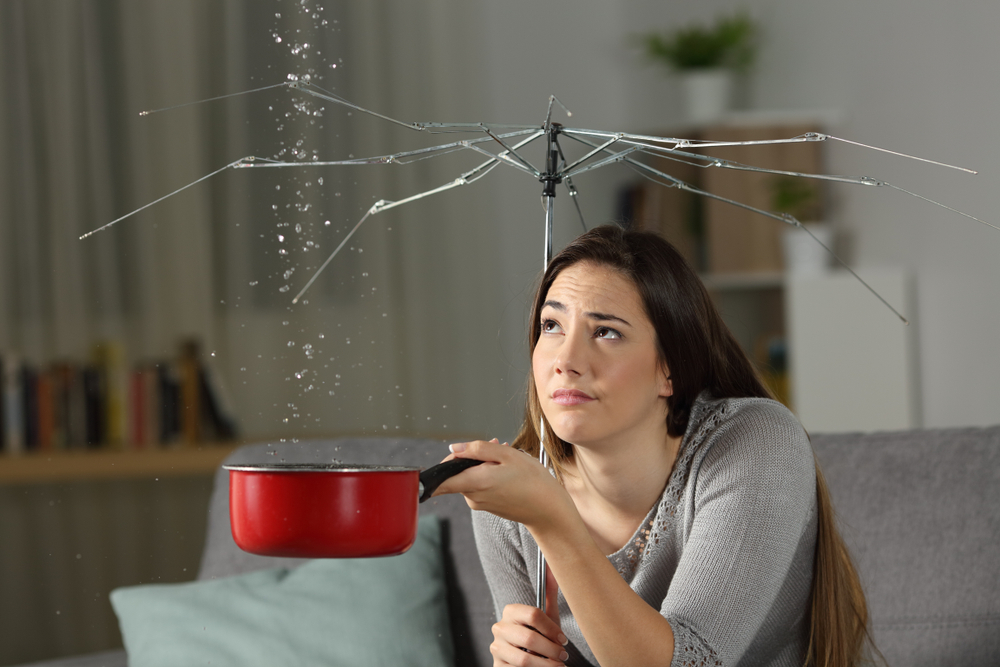
Getting water damage under control is hard enough without dealing with a denied insurance claim. Unfortunately, many homeowners face this exact situation when paperwork, documentation, or policy details do not line up in their favor. With the right guidance, you can challenge a denial and still get the coverage you need. Many families turn to insurance restoration services in San Diego for both cleanup and claim support, especially when their claim is denied, ensuring nothing is missed in the process.

What should I do if my water damage insurance claim gets denied?

efficient insurance restoration services in San Diego

A denial is not always the end of the road. There are steps you can take to understand why it happened and to prepare for a stronger case.

1. Review the denial letter carefully

Your insurer is required to explain the reason for denying your claim. Common causes include missed deadlines, insufficient documentation, or excluded damages. Reading the letter closely helps you identify the specific issue you need to address.

2. Compare with your policy

Once you understand the reason given, go back to your policy. Check whether the denial matches the language in your coverage. Sometimes insurers misinterpret their own rules, and knowing your rights can give you leverage.

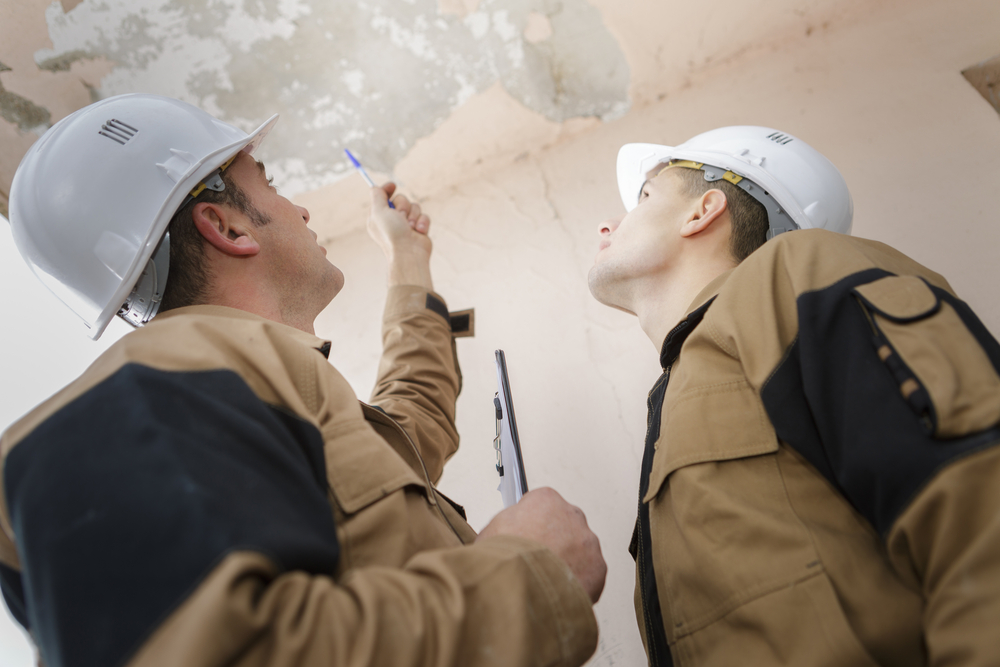
3. Gather more evidence

Missing or incomplete documentation is one of the top reasons claims are denied. Collect additional photos, repair estimates, and witness statements if possible. Stronger evidence often makes a big difference when appealing.

4. Reach out for professional help

A denied claim can be overwhelming. Restoration specialists, adjusters, or attorneys may all provide valuable support. Their experience helps you avoid mistakes and strengthen your appeal.

How can I appeal a denied water damage claim with my insurance company?

Appealing means presenting your case again with more detail and stronger evidence. The goal is to show why the original decision should be overturned.

1. Submit a formal appeal

Insurers typically require a written appeal that includes supporting documentation. Make sure you follow their exact process and submit everything within the stated deadlines. Missing these requirements may result in another denial.

2. Add expert evaluations

Bringing in independent experts can boost your case. For example, a contractor’s assessment may highlight structural damage the insurer overlooked. Professional opinions carry weight and can counter weak arguments in the original denial.

3. Keep communication professional

Stay clear, respectful, and organized in your communication. Document every call and email, and keep copies of everything you send. Professional communication builds credibility and helps avoid misunderstandings.

4. Consider third-party support

If your appeal still stalls, bringing in outside support may be necessary. This could include a public adjuster, mediation service, or legal counsel. Sometimes knowing you have experts on your side encourages insurers to take your claim more seriously.

How can I find efficient insurance restoration services in San Diego and the vicinity?

How can I appeal a denied water damage claim with my insurance company?

When a claim gets denied, you need more than a second attempt—you need a team that understands both restoration and advocacy. Risk Free Serv offers complete support, from cleaning up the damage to navigating the appeal process. If you are curious about ways public adjusters assist with water damage claims, wondering about the signs you should get a lawyer for an insurance dispute, or need guidance on the best way to document water damage for insurance, we can help you every step of the way. 

While our crew restores your home, you can take a break and enjoy the shops and waterfront views at Seaport Village in San Diego, confident that your case is being handled with care. Call us today to get started on rebuilding and reclaiming your peace of mind.

Top 5 Causes of Sink Overflows & How to Prevent Them

A sink overflow might seem like a minor inconvenience, but it can lead to serious water damage, costly repairs, and even health hazards if not addressed quickly. Timely action is key, especially when it comes to cleanup. In this blog, we’ll explore the top 5 causes of sink overflows and offer practical tips to help you prevent them. 

Whether it’s a hidden clog or a faulty stopper, understanding the root causes can help you avoid unexpected messes. And if you’re already dealing with water damage, professional overflow cleanup in 4S Ranch is just a call away. Read on.

How to prevent sink overflow?

Whether it happens in the kitchen or bathroom, an overflowing sink can damage cabinetry, flooring, and even the structure beneath your home. Fortunately, most sink overflows are preventable with a bit of awareness and regular maintenance:

1. Clogged drains

One of the most common reasons is a clogged drain. Over time, grease, food particles, hair, soap scum, and debris accumulate in the pipes, restricting water flow. When the water has nowhere to go, it backs up—and the sink overflows.

Prevention tip:

Use drain strainers to catch hair and debris before they enter the pipe. Avoid pouring grease or oil down the kitchen sink. Regularly flush your drains with a mix of hot water and baking soda, followed by vinegar, to keep buildup in check.

How to prevent sink overflow

2. Malfunctioning sink stoppers

A sink stopper is designed to hold water in the basin when needed, but if it malfunctions or gets stuck in the closed position, water can build up and overflow without warning. This is especially common in bathroom sinks with mechanical pop-up stoppers.

Prevention tip:

Periodically check your sink stopper to ensure it moves freely and isn’t stuck. Clean around the stopper regularly to prevent buildup that can hinder its operation. If the mechanism feels stiff or unresponsive, it may be time to replace it.

3. Blocked overflow drain

Most bathroom sinks are equipped with an overflow hole located near the top of the basin. This feature is meant to divert excess water before it reaches the edge. However, if the overflow channel becomes clogged with debris, toothpaste, or mold, it won’t function properly.

Prevention tip:

Use a funnel to pour a cleaning solution (like vinegar or mild bleach) into the overflow hole every few months. This helps clear out buildup and prevents blockages that could render the feature ineffective during high water flow.

4. Leaving faucets unattended

It might seem obvious, but many overflows occur simply because someone left a faucet running and forgot about it. Whether distracted by a phone call or a child’s urgent need, it only takes a few minutes for a sink to fill and spill.

Prevention tip:

Get into the habit of never walking away from a running faucet, especially in homes with children. Installing motion-sensor or timed shut-off faucets can also be a smart investment for forgetful households.

5. Plumbing vent issues

Plumbing systems rely on air vents to maintain proper pressure and allow wastewater to flow smoothly. If these vents are blocked or damaged, it can slow drainage and lead to backups—even if the pipes themselves aren’t clogged.

Prevention tip:

If you notice gurgling sounds when draining water or frequent slow drainage, have a professional inspect your plumbing vents. Birds’ nests, debris, or frost buildup can all obstruct vents, causing your system to behave unpredictably.

Who provides reliable overflow cleanup in 4S Ranch?

reliable overflow cleanup in 4S Ranch

Whether you’re curious to learn more about the most common causes of dishwasher leaks, why it’s important to properly remove gray water, or how to repair cabinet water damage, reach out to Risk Free Serv. Our experts are here to thoroughly assess your situation and provide prompt, high-quality service. Whether you need us in 4S Ranch or across the region, you can count on our qualified team. Get in touch with us today!

What Is Gray Water & Why Proper Removal Matters

Gray water is the relatively clean wastewater that comes from sinks, showers, washing machines, and other household sources—excluding toilets. While it may seem harmless, gray water can contain soap residue, food particles, grease, and bacteria, making proper handling essential. 

If not managed correctly, it can lead to odors, mold growth, and health risks. That’s why professional gray water removal in 4S Ranch is crucial for protecting both your property and well-being. In this article, we’ll explain what gray water is, the risks it poses, and why swift, expert removal is key to maintaining a safe and sanitary home environment.

Why is grey water bad?

Why is grey water bad

It can be harmful because it contains bacteria, detergents, and organic matter that may cause odors, promote mold growth, and pose health risks if left untreated or if it comes in contact with living spaces.

Sources of gray water typically include:

  • Bathroom sinks
  • Showers and tubs
  • Washing machines
  • Dishwashers (in some cases)

Common risks include:

  • Odors: As organic matter breaks down, gray water emits unpleasant smells.
  • Mold and mildew: Moisture combined with organic debris promotes fungal growth on surfaces.
  • Structural damage: Prolonged exposure to moisture can warp wood, damage drywall, and weaken flooring.
  • Health concerns: Contact with untreated gray water can lead to skin irritation, allergic reactions, or infections.

If it sits for more than 24–48 hours, it can begin to transition into black water, which is much more dangerous and requires specialized cleanup.

Situations that require professional removal

While small amounts (like from a minor appliance leak) can often be cleaned safely with the right precautions, larger spills or flooding events require professional removal and treatment.

You should call in experts if:

  • The water has spread across multiple rooms or levels
  • It’s been standing for more than a few hours
  • You suspect mold or strong odors
  • The source is unknown or contains visible contaminants
  • The spill has affected electrical systems, insulation, or structural materials

Professionals use specialized equipment like pumps, extractors, dehumidifiers, and antimicrobial treatments to ensure that all water is removed and the area is sanitized.

Environmental considerations

Some areas allow for treated gray water to be reused for non-potable applications like irrigation or flushing toilets. However, this should only be done through an approved gray water system. Improper disposal—such as dumping it into storm drains or letting it seep into the ground—can contaminate local water sources and violate local health regulations.

The hidden dangers

Proper gray water management is also essential for maintaining indoor air quality. As moisture lingers in carpets, walls, and other materials, it creates an environment where harmful microorganisms thrive. Even after visible water is gone, hidden dampness can continue to degrade surfaces and compromise structural integrity. 

Acting promptly not only protects your health but also preserves the value of your home. In many cases, homeowners’ insurance may cover cleanup if the damage was sudden and accidental, so it’s worth checking your policy. When in doubt, always consult a professional to assess the situation and recommend the safest course of action.

Need efficient gray water removal in 4S Ranch?

efficient gray water removal in 4S Ranch

If you’re looking for efficient ways to fix cabinet water damage or want to explore common causes of dishwasher leaks and sink overflows, Risk Free Serv is here to help. With years of experience and a dedicated crew, we have what it takes to provide you with comprehensive and reliable services and restore your home to its previous condition. No matter if you need us in 4S Ranch or across North County, all you need to do is give us a call, and we’ll be right with you to help. Call today!

Common Causes of Dishwasher Leaks & When to Call the Pros

A dishwasher leak in 4S Ranch is exactly the kind of drama no homeowner ever wants to see, but it’s surprisingly common. One moment, your kitchen is fine and everybody’s going on with their usual routine, and the next, you’re faced with a puddle of water that demands your immediate attention. It’s easy to overlook just how convenient everything is when our dishwasher seems to run normally. Unfortunately, a water leak from the dishwasher can quickly escalate into a big and costly problem if left unchecked.

Whether it’s a small pool forming near the base due to a dishwasher leaking from the bottom or water slowly creeping out over time, leaks are a red flag that something is definitely not right. Thankfully, a lot of dishwasher issues are fixable without replacing the entire unit if you catch the problem early and react without delay.

In today’s post, we break down the most common causes of this annoying residential problem, let you know how to recognize the warning signs, and outline what you can do to embrace prevention and avoid the issues altogether.

dishwasher leaking from bottom

Why does my dishwasher leak?

It’s important to determine whether your dishwasher is leaking under the floor or from the back, because it can point to the reason behind the malfunction.

Luckily, most of these issues represent an easy fix for a skilled pair of hands. The key is catching the problem early because most leaks boil down to wear and tear on gaskets, hoses, and internal parts that are easy to replace. 

If you keep up with regular maintenance, don’t overdo it with the detergent, and always make sure that your dishwasher is level, you probably won’t have to worry about how to repair a dishwasher leak. Always remember that little attention now can save you from dealing with the big headaches later.

1. Door gasket issues

The soft rubber seal around your dishwasher door is called the gasket, and it plays a crucial role in keeping water where it belongs. Over time, gaskets become stiff, crack, warp, or just lose their grip. If you’re wondering what causes a dishwasher to leak out the front, a worn-out gasket could be the culprit you’re looking for.

Quick fix: 

Open the door and feel the gasket with your fingers to identify any obvious damage. Look for any signs of cracks in the rubber, mold buildup, or stiffness of the material. If the rubber feels brittle, it probably won’t form a snug seal, and it’s time to replace it. Fortunately, a gasket is an inexpensive part, and your trusted plumbers who fix dishwasher leaks can swap it out with minimal effort.

2. Loose or damaged hoses

Your dishwasher has a few hoses—primarily the inlet hose that brings in the water and the drain hose that sends it out. If either of these starts to loosen at the connection or develops a small crack, pretty soon you’ll have a water leak from the dishwasher on your hands.

How to do a check-up:

Slowly pull out the dishwasher. Look for signs of water or wetness around the joints. Gently tug on the hose, but don’t be alarmed by loose fittings—they are common. If you spot corrosion or cracking, it’s high time to replace the hose.

3. Cracked tub or rusted interior

In busy homes, dishwashers see daily use, and older models sometimes develop cracks near the bottom of the tub. This is more common in older models with plastic dishwasher tubs than stainless steel ones.

Signs to watch:

If the leak seems to be underneath the dishwasher and you’ve already ruled out the hoses, it may be a cracked tub, especially if you notice any rust, bubbling, or pitting.

4. Faulty float switch

The faulty switch is a small but important part that tells your dishwasher when to stop filling with water. If it gets stuck, breaks, or malfunctions in any way, a dishwasher leak can occur during your regular wash cycle.

What to do:

Open your dishwasher and locate the float (the small dome or disc near the front end of the dishwasher tub). Try to gently move it up and down. It should glide smoothly. If it feels stuck or jammed with debris, don’t force it, and try to clean around it if you can. If the issues persist, the float switch might need replacement, and it’s best that you call proven plumbers who fix dishwasher leaks in 4S Ranch.

5. Malfunctioning spray arm

Dishwasher spray arms are a moving part that is designed to spray water evenly over the dishes while it rotates. If it gets cracked, warped, or clogged with scale, it may start shooting water straight at the door or base, with the dishwasher leaking from the bottom. Don’t panic, these types of issues usually look more serious than they really are.

Pro tip:

Remove the spray arm if you can to inspect it for a sign of blockage or damage. Clean it thoroughly, put it back, and spin it to ensure it moves smoothly. If it doesn’t spin freely, you’ll have to contact the pros to install a replacement.

6. Detergent overload

Believe it or not, using the wrong kind or the wrong amount of detergent can cause a dishwasher leak. Too much soap leads to too many suds that have nowhere to go but to push against the door and seep from the sides.

How to avoid this:

Always use the right dishwasher detergent and don’t ever get tempted to try out regular dish soap. It’s also important to stick to the recommended dose. If you have trouble determining the recommended dose, use the pods, and they will prevent you from overpouring the detergent.

7. Misaligned dishwasher

This sounds like a minor issue, but it can cause numerous problems. If your dishwasher tilts to one side, it can cause a dishwasher to leak out the front or water to pool and drip out in odd places. Uneven placement also puts pressure on the door, further increasing the chances of a leak.

Quick check:

Grab a spirit level and place it on the top of your dishwasher door frame. If it’s not even, try to adjust until everything sits properly. Don’t forget to check the situation at the back of the machine since this often gets overlooked during routine checkups.

8. Drainage backflow

Sometimes you’ll find yourself scratching your head, wondering: ‘Why does my dishwasher leak?’, but the issue is to be found elsewhere. For instance, at the drain line. If the dishwasher is trying to pump out water but it can’t, the backed-up water will look for somewhere to go. This sometimes leads to the dishwasher leaking under the floor or through the door.

How to prevent this:

Make sure there’s a high enough loop in the drain hose under the sink to prevent backflow. Some building codes require an air gap, and it may be smart to check with your plumbers whether you should install one.

dishwasher leaking under floor

Where can I find dependable plumbers to repair a dishwasher leak in 4S Ranch, CA & beyond?

If you’re looking for reputable plumbers who fix dishwasher leaks, look no further than Risk Free Serv. As the leading team of experts in all things water emergencies in San Diego County, we specialize in efficiency, precision, and lasting solutions that will bring back your home comfort with minimal disruption.

If you need help with your dishwasher, want to treat water damage to your wooden cabinets, or you need pros who can react in a matter of minutes to remove gray water, prevent sink overflow, and help you avoid similar disasters, we’re here to answer your call. Just pick up the phone, tell us what’s troubling you, and we’ll get down to the nitty-gritty while you’re relaxing at Heritage Park with your loved ones. Call us ASAP!

Cabinet Water Damage: What to Look For and How to Fix It

While kitchen cabinets play a big role in how your kitchen looks, they’re also the kings of functionality. They risk wear and tear, working hard every day to store your canned food, condiments, and heavy cookware. But regular wear and tear is nothing compared to water damage. Whether it’s a slow-building leak under the sink, a busted pipe behind the wall, or a spill that never got cleaned up, water damage works steadily but quietly, until one day your cabinets are swollen, warped, or start smelling funky.

Moisture is the worst enemy of wood and the leading cause of kitchen cabinets water damage in 4S Ranch. And once it makes its way in, it usually doesn’t take long for the damage to spread. From peeling surfaces and sagging bottoms to stubborn mold issues, water and wooden cabinets don’t mix well.

The good news? Reacting quickly and turning to proven water damage experts can prevent serious and costly damage. In today’s post, we dive into the usual causes of moisture damage and provide tips on how to dry cabinets after a water leak and how to repair kitchen cabinets affected by water damage.

How to dry out wet cabinets?

When water comes into contact with kitchen cabinets, the first (and most important) step is to dry them completely of excess moisture before you start work on them. Fixing damp wood is like putting a Band-Aid on a wet wound—it just won’t work. Here’s a step-by-step guide on how to tackle water damage on kitchen cabinets:

how to dry out wet cabinets

1. Stop the water source

This is an obvious point, but in the heat of an emergency, it’s not uncommon to lose your head and forget the basics. Identify the source of moisture and shut it off, whether it’s a leaky pipe, dripping faucet, cracked sink, or clogged main line. There is no point in trying to dry the cabinets after a water leak if incoming flow keeps soaking them up.

2. Empty them out

Take everything out of the affected cabinets. Go with the foodstuffs first, before proceeding to the cleaning products and the dishes. Leave them open to increase air flow and prevent moisture from building up inside or causing more water damage under the kitchen cabinets.

3. Soak up visible water

Use microfiber cloths as they can absorb a lot of fluids. You can also use a kitchen rag or paper towels if they are close at hand. Some powerful vacuum cleaners also have the option of dealing with liquids in a swift and effective manner. 

4. Dehumidifiers & desiccants

A good way to deal with high humidity or prolonged exposure to water (like in a flood) is to use a dehumidifier that can draw the moisture away from your possessions and effectively dry out wet cabinets. You can also place desiccants (silica gel packs found in most software) inside the cabinets to absorb moisture and speed things up.

5. Inspect for mold

Even if things look completely dry, moisture is tricky, and it may be hiding behind or beneath the cabinets. Musty smells, black, brown, or green specks, and fuzziness on wood are telltale signs that mold is starting to settle in. Prompt reaction is crucial with mold, so the faster you call in the specialists, the better chances you have of easily dealing with kitchen cabinets water damage.

How to fix water damage on cabinets?

Ok, once the cabinets are paper-dry, it’s time to assess the damage done and apply a fix where it’s needed. Depending on the amount of water and the duration of moisture exposure, you may get away with a few well-placed touch-ups, or you may have to rely on a full-on panel replacement.

1. Inspect the extent of damage

You can call in the pros to deal with the water damage to your kitchen cabinets in 4S Ranch until you get a clear idea of the scope of the damage inflicted. 

  • Surface warping: If you notice slight swelling or warping in cabinet doors or panels, you may get away with just a sanding and refinishing job.
  • Peeling veneer or laminate: No matter how good it is, when exposed to water for a certain amount of time, most glues loosen, and you start to notice peeling edges. 
  • Discoloration or stains: Yes, they look bad, but knowledgeable pros can usually just clean, bleach, and paint them over.
  • Structural weakness: There is no help for soft spots, spongy wood, or a crumbling medium-density fibreboard (MDF); you’ll just need to look for a replacement.

2. Reglue loose veneer

In case of minor peeling, gently lift the loose edge and apply the appropriate glue underneath. Press it back into place and put a heavy object or a clamp to hold it tight for 24 hours. 

3. Sand the warped wood

If your wood is stained or warped, you can try to refinish it or smooth out the damaged spots with a medium-grit sandpaper. It’s recommended that you start with 120-grit and work your way up to 220. Once even, just wipe down with a damp cloth and reapply the wood stain, paint, or finish to match their original look.

4. Replace cabinet panels if needed

In cases where the damage is beyond cosmetic and you can’t repair kitchen cabinets after water damage, you’ll probably need to replace the doors or side panels. Fortunately, many cabinet brands offer replacement parts, so you won’t have to splurge on a whole new setup.

5. Seal & protect

After repairs, apply a protective sealer to your cabinet surfaces, especially around the sinks, dishwashers, and other high-moisture areas. A polyurethane finish, marine varnish, or moisture-resistant paint are good options to prevent future issues.

Pro tip: Know when it’s time to call the professionals

how to repair kitchen cabinets with water damage

While you can do certain things on your own, if your cabinets are sagging, moldy, or severely damaged, there is no point in trying a DIY approach to fix water damage on cabinets.

You’ll put in the hours and effort only to end up paying more in the end. And it’s not just a question of money but also safety. 

Water can compromise your entire cabinet structure and even the wall behind it. The last thing you want is for the whole thing to fall on someone while they’re preparing their meal. Specialists in water damage can take care of moisture testing, mold remediation, and ensure that the restoration of water-damaged cabinets is done properly.

Who should I call to deal with water damage under my kitchen cabinets in 4S Ranch, CA & the area?

If you’re wondering how to dry out wet cabinets or how to fix water damage on cabinets after a leak, Risk Free Serv is your proven solution in North County, San Diego, and beyond. With high-end equipment, a vetted and experienced team, and a proven approach that goes into fine detail, we offer prompt and thorough remediation of water damage to cabinets, minor and complex dishwasher leaks, sewer backups, and so much more.

Booking our service is easy. Just give us a quick call, and we won’t waste a minute before getting the show on the road to help you out. And the best bit? You’re free to get some air at Community Park and unwind while we get to the bottom of your water-related emergency, whether it be gray water removal, sink overflow prevention, or cabinetry rescue. To get everything dry and back to its normal functioning, contact us now!

Why You Need to Act Within 24 Hours of Water Damage

When water damage in Carmel Valley hits your home, whether from a burst pipe, leaking appliance, storm, or flood, it can feel like chaos. The natural reaction is to pause, assess the damage, and figure out what to do next. But the truth is, time is your biggest enemy when it comes to water intrusion. Waiting even a day can turn a manageable cleanup into a full-blown remediation project.

In fact, the first 24 hours after water damage are critical. What you do, or don’t do, during this window can have serious consequences for your property, your health, and your wallet. Mold starts growing fast. Structural materials start breaking down. And insurance claims? They get trickier the longer you wait.

Why should I act fast after damage?

If you’re dealing with a leak, flood, or any kind of moisture intrusion, don’t take a “wait and see” approach. Call a professional water damage restoration team right away, ideally within the first few hours. Let’s break down why fast action isn’t just smart—it’s necessary.

1. Mold can start growing in as little as 24 Hours

One of the biggest threats after water damage is mold growth. Mold spores are already in the air, just waiting for the right conditions to take hold. Give them moisture, warmth, and a dark space, and they’ll start multiplying like crazy. Often within 24 to 48 hours.

Mold doesn’t just damage surfaces—it can trigger allergic reactions, asthma symptoms, and other health issues, especially in kids, older adults, or people with compromised immune systems.

2. Water soaks deep into building materials

Water doesn’t just sit on the surface—it seeps. Drywall, insulation, wood, and flooring materials all absorb water quickly. The longer water is allowed to soak in, the more structural damage it causes. Drywall can warp, swell, or crumble. Wood can rot. Flooring can start to buckle or lift.

Even if it looks dry on the surface, hidden moisture can lead to major problems down the line. 

3. Your insurance coverage may depend on it

Here’s a harsh truth: Most home insurance policies require you to take “reasonable action” to prevent further damage after a water event. That means if you sit around for a few days before calling someone, your claim could be denied, or you might not get full coverage.

Insurance adjusters want to see that you took steps to stop the damage, like calling a water restoration company, shutting off the water supply, or starting to remove excess water. 

4. Bacteria & contaminants spread fast

Not all water damage is clean water. If the source is a sewage backup, storm runoff, or floodwater from outside, you’re dealing with “Category 3” water, also known as black water. It’s loaded with bacteria, pathogens, and chemical contaminants that can pose serious health risks.

Even clean water becomes unsafe if it sits too long. Carpets, upholstery, and drywall can become breeding grounds for bacteria and fungi. 

5. Restoration costs go up the longer you wait

Time really is money when it comes to water damage. The sooner you start the drying and restoration process, the less damage there is to fix. That means lower repair costs and less disruption to your life.

Wait too long, and the scope of work expands. What started as water extraction and drying might now require demolition, mold remediation, structural repairs, and even replacement of floors, cabinets, or drywall. In some cases, the costs can multiply exponentially, and you might have to move out during the process.

widespread water damage in Carmel Valley

Who should I call for help with water damage in Carmel Valley, CA & nearby?

No matter which side of the Carmel River your home is situated on, Risk Free Serv will be there without delay to help you minimize the damage and deal with the pressing issue at hand. Timely reaction in these types of situations can make the difference between a minor problem and a full-blown residential calamity, so it’s important that you turn to professionals ASAP.

From expertise in spotting mold growth in its early stages to time-tried solutions that will stop it from coming back, we have what it takes to spot mold development before it takes root. Water damage doesn’t wait, so you shouldn’t either, call us now!