Uncategorized

Cabinet Water Damage: What to Look For and How to Fix It

While kitchen cabinets play a big role in how your kitchen looks, they’re also the kings of functionality. They risk wear and tear, working hard every day to store your canned food, condiments, and heavy cookware. But regular wear and tear is nothing compared to water damage. Whether it’s a slow-building leak under the sink, a busted pipe behind the wall, or a spill that never got cleaned up, water damage works steadily but quietly, until one day your cabinets are swollen, warped, or start smelling funky.

Moisture is the worst enemy of wood and the leading cause of kitchen cabinets water damage in 4S Ranch. And once it makes its way in, it usually doesn’t take long for the damage to spread. From peeling surfaces and sagging bottoms to stubborn mold issues, water and wooden cabinets don’t mix well.

The good news? Reacting quickly and turning to proven water damage experts can prevent serious and costly damage. In today’s post, we dive into the usual causes of moisture damage and provide tips on how to dry cabinets after a water leak and how to repair kitchen cabinets affected by water damage.

How to dry out wet cabinets?

When water comes into contact with kitchen cabinets, the first (and most important) step is to dry them completely of excess moisture before you start work on them. Fixing damp wood is like putting a Band-Aid on a wet wound—it just won’t work. Here’s a step-by-step guide on how to tackle water damage on kitchen cabinets:

how to dry out wet cabinets

1. Stop the water source

This is an obvious point, but in the heat of an emergency, it’s not uncommon to lose your head and forget the basics. Identify the source of moisture and shut it off, whether it’s a leaky pipe, dripping faucet, cracked sink, or clogged main line. There is no point in trying to dry the cabinets after a water leak if incoming flow keeps soaking them up.

2. Empty them out

Take everything out of the affected cabinets. Go with the foodstuffs first, before proceeding to the cleaning products and the dishes. Leave them open to increase air flow and prevent moisture from building up inside or causing more water damage under the kitchen cabinets.

3. Soak up visible water

Use microfiber cloths as they can absorb a lot of fluids. You can also use a kitchen rag or paper towels if they are close at hand. Some powerful vacuum cleaners also have the option of dealing with liquids in a swift and effective manner. 

4. Dehumidifiers & desiccants

A good way to deal with high humidity or prolonged exposure to water (like in a flood) is to use a dehumidifier that can draw the moisture away from your possessions and effectively dry out wet cabinets. You can also place desiccants (silica gel packs found in most software) inside the cabinets to absorb moisture and speed things up.

5. Inspect for mold

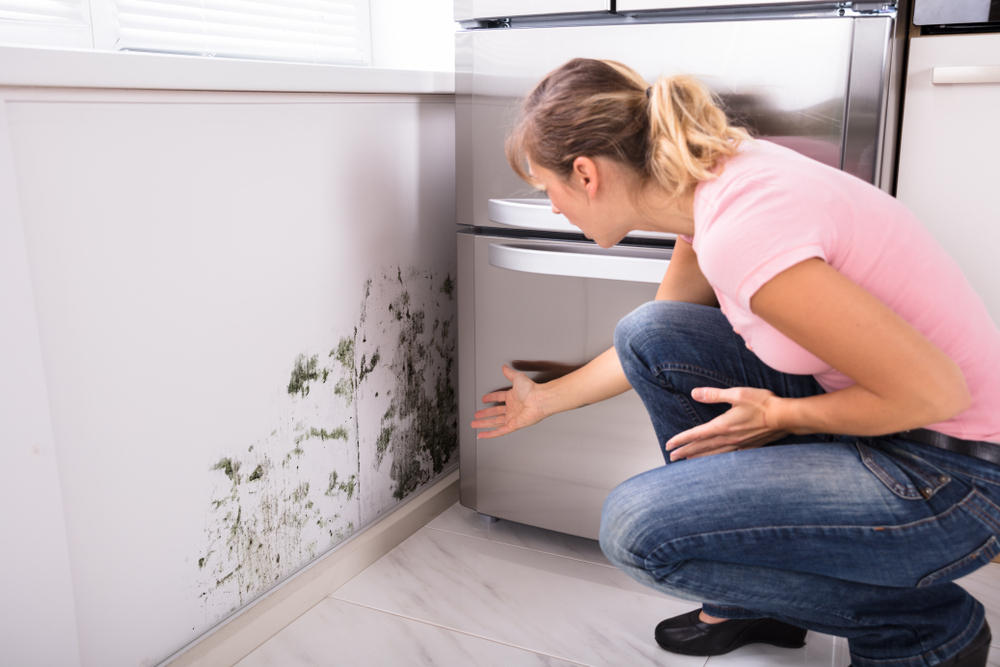
Even if things look completely dry, moisture is tricky, and it may be hiding behind or beneath the cabinets. Musty smells, black, brown, or green specks, and fuzziness on wood are telltale signs that mold is starting to settle in. Prompt reaction is crucial with mold, so the faster you call in the specialists, the better chances you have of easily dealing with kitchen cabinets water damage.

How to fix water damage on cabinets?

Ok, once the cabinets are paper-dry, it’s time to assess the damage done and apply a fix where it’s needed. Depending on the amount of water and the duration of moisture exposure, you may get away with a few well-placed touch-ups, or you may have to rely on a full-on panel replacement.

1. Inspect the extent of damage

You can call in the pros to deal with the water damage to your kitchen cabinets in 4S Ranch until you get a clear idea of the scope of the damage inflicted. 

  • Surface warping: If you notice slight swelling or warping in cabinet doors or panels, you may get away with just a sanding and refinishing job.
  • Peeling veneer or laminate: No matter how good it is, when exposed to water for a certain amount of time, most glues loosen, and you start to notice peeling edges. 
  • Discoloration or stains: Yes, they look bad, but knowledgeable pros can usually just clean, bleach, and paint them over.
  • Structural weakness: There is no help for soft spots, spongy wood, or a crumbling medium-density fibreboard (MDF); you’ll just need to look for a replacement.

2. Reglue loose veneer

In case of minor peeling, gently lift the loose edge and apply the appropriate glue underneath. Press it back into place and put a heavy object or a clamp to hold it tight for 24 hours. 

3. Sand the warped wood

If your wood is stained or warped, you can try to refinish it or smooth out the damaged spots with a medium-grit sandpaper. It’s recommended that you start with 120-grit and work your way up to 220. Once even, just wipe down with a damp cloth and reapply the wood stain, paint, or finish to match their original look.

4. Replace cabinet panels if needed

In cases where the damage is beyond cosmetic and you can’t repair kitchen cabinets after water damage, you’ll probably need to replace the doors or side panels. Fortunately, many cabinet brands offer replacement parts, so you won’t have to splurge on a whole new setup.

5. Seal & protect

After repairs, apply a protective sealer to your cabinet surfaces, especially around the sinks, dishwashers, and other high-moisture areas. A polyurethane finish, marine varnish, or moisture-resistant paint are good options to prevent future issues.

Pro tip: Know when it’s time to call the professionals

how to repair kitchen cabinets with water damage

While you can do certain things on your own, if your cabinets are sagging, moldy, or severely damaged, there is no point in trying a DIY approach to fix water damage on cabinets.

You’ll put in the hours and effort only to end up paying more in the end. And it’s not just a question of money but also safety. 

Water can compromise your entire cabinet structure and even the wall behind it. The last thing you want is for the whole thing to fall on someone while they’re preparing their meal. Specialists in water damage can take care of moisture testing, mold remediation, and ensure that the restoration of water-damaged cabinets is done properly.

Who should I call to deal with water damage under my kitchen cabinets in 4S Ranch, CA & the area?

If you’re wondering how to dry out wet cabinets or how to fix water damage on cabinets after a leak, Risk Free Serv is your proven solution in North County, San Diego, and beyond. With high-end equipment, a vetted and experienced team, and a proven approach that goes into fine detail, we offer prompt and thorough remediation of water damage to cabinets, minor and complex dishwasher leaks, sewer backups, and so much more.

Booking our service is easy. Just give us a quick call, and we won’t waste a minute before getting the show on the road to help you out. And the best bit? You’re free to get some air at Community Park and unwind while we get to the bottom of your water-related emergency, whether it be gray water removal, sink overflow prevention, or cabinetry rescue. To get everything dry and back to its normal functioning, contact us now!

Why You Need to Act Within 24 Hours of Water Damage

When water damage in Carmel Valley hits your home, whether from a burst pipe, leaking appliance, storm, or flood, it can feel like chaos. The natural reaction is to pause, assess the damage, and figure out what to do next. But the truth is, time is your biggest enemy when it comes to water intrusion. Waiting even a day can turn a manageable cleanup into a full-blown remediation project.

In fact, the first 24 hours after water damage are critical. What you do, or don’t do, during this window can have serious consequences for your property, your health, and your wallet. Mold starts growing fast. Structural materials start breaking down. And insurance claims? They get trickier the longer you wait.

Why should I act fast after damage?

If you’re dealing with a leak, flood, or any kind of moisture intrusion, don’t take a “wait and see” approach. Call a professional water damage restoration team right away, ideally within the first few hours. Let’s break down why fast action isn’t just smart—it’s necessary.

1. Mold can start growing in as little as 24 Hours

One of the biggest threats after water damage is mold growth. Mold spores are already in the air, just waiting for the right conditions to take hold. Give them moisture, warmth, and a dark space, and they’ll start multiplying like crazy. Often within 24 to 48 hours.

Mold doesn’t just damage surfaces—it can trigger allergic reactions, asthma symptoms, and other health issues, especially in kids, older adults, or people with compromised immune systems.

2. Water soaks deep into building materials

Water doesn’t just sit on the surface—it seeps. Drywall, insulation, wood, and flooring materials all absorb water quickly. The longer water is allowed to soak in, the more structural damage it causes. Drywall can warp, swell, or crumble. Wood can rot. Flooring can start to buckle or lift.

Even if it looks dry on the surface, hidden moisture can lead to major problems down the line. 

3. Your insurance coverage may depend on it

Here’s a harsh truth: Most home insurance policies require you to take “reasonable action” to prevent further damage after a water event. That means if you sit around for a few days before calling someone, your claim could be denied, or you might not get full coverage.

Insurance adjusters want to see that you took steps to stop the damage, like calling a water restoration company, shutting off the water supply, or starting to remove excess water. 

4. Bacteria & contaminants spread fast

Not all water damage is clean water. If the source is a sewage backup, storm runoff, or floodwater from outside, you’re dealing with “Category 3” water, also known as black water. It’s loaded with bacteria, pathogens, and chemical contaminants that can pose serious health risks.

Even clean water becomes unsafe if it sits too long. Carpets, upholstery, and drywall can become breeding grounds for bacteria and fungi. 

5. Restoration costs go up the longer you wait

Time really is money when it comes to water damage. The sooner you start the drying and restoration process, the less damage there is to fix. That means lower repair costs and less disruption to your life.

Wait too long, and the scope of work expands. What started as water extraction and drying might now require demolition, mold remediation, structural repairs, and even replacement of floors, cabinets, or drywall. In some cases, the costs can multiply exponentially, and you might have to move out during the process.
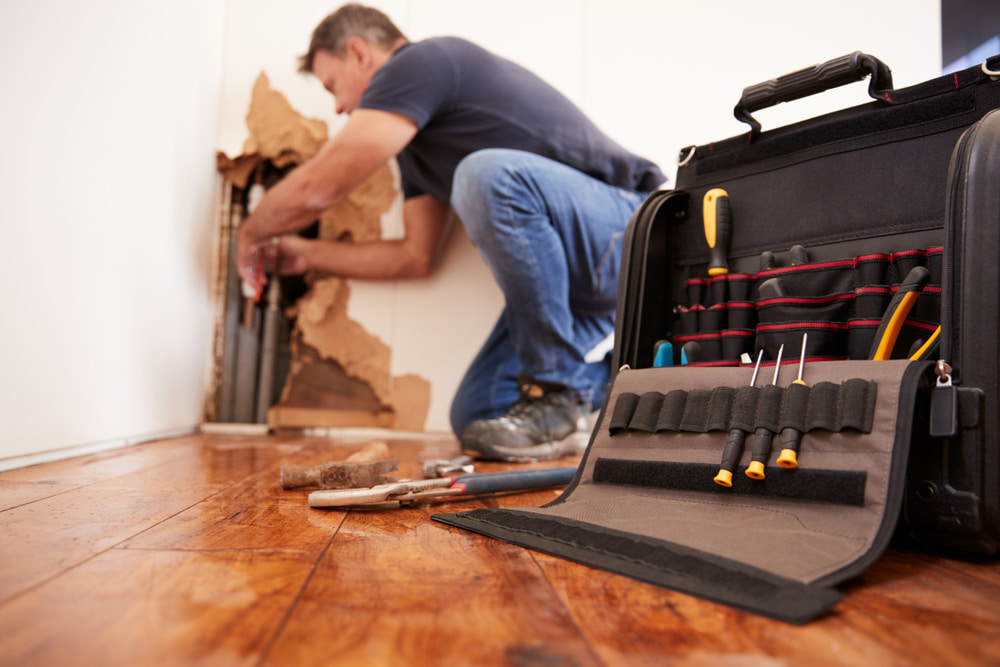
widespread water damage in Carmel Valley

Who should I call for help with water damage in Carmel Valley, CA & nearby?

No matter which side of the Carmel River your home is situated on, Risk Free Serv will be there without delay to help you minimize the damage and deal with the pressing issue at hand. Timely reaction in these types of situations can make the difference between a minor problem and a full-blown residential calamity, so it’s important that you turn to professionals ASAP.

From expertise in spotting mold growth in its early stages to time-tried solutions that will stop it from coming back, we have what it takes to spot mold development before it takes root. Water damage doesn’t wait, so you shouldn’t either, call us now!

5 Telltale Signs That You Need Mold Remediation

Mold is one of those household problems that can sneak up on you fast. One day everything looks fine, and the next you’re wondering if that spot on the ceiling is just a stain or the early signs of something much worse. Mold isn’t just an eyesore; it’s a health hazard and a structural threat if left unchecked. But how do you really know when it’s time to call in the pros for mold remediation?

In today’s article, we outline the clues you need to look for to avoid dealing with a developed and stubborn mold colony that just won’t go away. While timely water damage cleanup in Carmel Valley can go a long way in stopping mold in its tracks, sometimes it’s too late, and you have to move on to the mold remediation stage. But when is that, we hear you asking? Let’s delve deeper.

How do I know if I need mold remediation?

Mold problems don’t go away on their own. In fact, they get worse—and fast. If you notice any of the warning signs, don’t brush them off or hope for the best. The longer you wait, the more damage mold can do to your home, your health, and your peace of mind. So if your gut’s telling you something’s off, trust it, and call in the experts.

1. You can smell a musty odor

One of the first giveaways of a mold issue is that classic musty, damp smell. It’s not always visible at first, but your nose knows when something’s off. If certain areas of your home smell like an old basement or wet socks, especially after it rains or in humid spots like the bathroom, laundry room, or basement, there’s a good chance mold is lurking behind the scenes.

Even if you can’t see anything yet, persistent musty odors mean there’s excess moisture, which mold thrives on. This is a red flag that shouldn’t be ignored.

2. There are visible signs of mold growth

Let’s break it down: not every dark spot on the wall is mold, but it’s still worth checking out. Mold can be black, green, white, or even orange, depending on the surface and the type. It often shows up on drywall, ceilings, windowsills, and around HVAC vents.

You may see fuzzy patches, stains that seem to grow over time, or spots that keep coming back no matter how much you scrub. If mold is spreading or reappearing, surface cleaning alone won’t cut it—it’s time for professional remediation.

3. You’ve had recent water damage or flooding

Mold loves moisture. If your home has recently dealt with flooding, pipe leaks, roof damage, or even a slow drip under the sink, you’ve got prime mold-growing conditions. Mold can start developing in as little as 24 to 48 hours after water intrusion.

Even if the area looks dry now, water can seep behind walls and into materials like wood and insulation. That’s where mold can grow undetected. If you’ve had water damage and didn’t do a full dry-out with fans and dehumidifiers, a moisture inspection is highly recommended.

4. Allergies or respiratory symptoms are getting worse

Mold doesn’t just affect your home—it affects your health. If you or your family are suddenly experiencing more allergies, sneezing, coughing, itchy eyes, or even asthma flare-ups, mold could be the culprit. And here’s the kicker: these symptoms often get worse at home and improve when you leave.

Even if you’re not super sensitive to mold, prolonged exposure can cause issues over time. Anyone with respiratory conditions, a weakened immune system, or small kids should steer clear of mold exposure as much as possible. Health symptoms are a major indicator that it’s time to bring in the mold pros.

5. Discoloration or peeling on walls and ceilings

You might not see mold directly, but bubbling paint, peeling wallpaper, warped drywall, or unexplained stains can all be signs of moisture damage, and where there’s moisture, mold might not be far behind.

These signs usually mean that moisture is trapped behind the surface, creating the perfect breeding ground for mold. A mold remediation expert can use tools like moisture meters and infrared cameras to detect hidden issues you can’t see with the naked eye.

How do I know if I need mold remediation

Who specializes in methodical water damage cleanup in Carmel Valley, CA & the area?

Need help spotting mold before it gets out of hand? Want to stop mold from coming back? No worries! Risk Free Serv is primed and ready to start applying the fix ASAP. We’ll come armed with the latest technology and professional tools, bring a team of experienced specialists, and get down to work without delay. Time is of the essence in water damage, plumbing, and mold emergencies, so don’t waste time before calling professionals.

Give us a call, and you’re free to leave the home, catch some fresh air at Garland Ranch Regional Park, and spend quality time with your loved ones while we get to the bottom of your mold issues. Contact us now!

Why Mold Keeps Coming Back and How to Stop It

You scrub it, you spray it, you even rip out the drywall. But no matter what you do, the mold comes back, again and again. It’s not just frustrating; it can feel like your home is fighting against you. When mold keeps reappearing, it’s a clear sign that the root cause hasn’t been fully addressed. And more often than not, that root is tied to lingering moisture issues hidden beneath the surface. 

Recurring mold is a warning sign that something deeper is wrong. And while calling in specialists in water damage repair in Carmel Valley is essential, knowing what to look for can help you spot the early signs and understand when it’s time to bring in the pros. The more you understand about why mold keeps coming back, the better equipped you’ll be to stop it – for good.

What does it mean when mold keeps coming back?

When mold keeps returning, it’s a signal that something deeper is going on beneath the surface. Scrubbing mold away without treating the conditions that feed it is like mopping up water without fixing the leak. 

Moisture is a prime reason

The number one reason mold returns is moisture that never fully dried out. This could be the result of a slow leak, high humidity, poor ventilation, or water that was never properly removed after a flood or spill. Even a seemingly dry wall or floor can harbor trapped moisture behind the surface, especially in porous materials like wood, drywall, or insulation. Mold spores are always present in the air, just waiting for the “right” conditions in the form of moisture and warmth to settle in and grow.

Treating symptoms and not the source

Using store-bought cleaners or even bleach may kill surface mold, but it doesn’t eliminate mold roots embedded within materials. In porous surfaces, mold acts like a weed, sending filaments deep below what you can see. Wiping the top is just like mowing the lawn when you need to pull the roots. If your home wasn’t professionally dried and inspected after water damage, it’s likely that the source of the problem was never fully removed.

Airflow and humidity are working against you

Even after a leak is fixed, many homes continue to suffer from poor ventilation or trapped humidity. Bathrooms without exhaust fans, laundry rooms without airflow, or even basements that stay musty can all create a damp environment that mold loves. When these conditions aren’t corrected, mold will return like clockwork, often in the same spots you just treated.

Structural materials may be compromised

If mold is coming back in the same area, the building materials themselves may now be contaminated. Wood, drywall, insulation, and carpeting can hold onto mold spores even after surface cleaning. This is especially true if the materials weren’t fully dried or replaced after the initial water incident. Once contaminated, they often need to be professionally removed and replaced to stop the cycle for good.

How to get rid of mold if it keeps coming back?

Traditional cleaning methods just don’t cut it if you notice that mold keeps reappearing. To truly stop the cycle, you need a multi-layered approach – one that goes beyond surface-level fixes and tackles the environment mold depends on. Here’s how to break the cycle once and for all.

Step 1: Identify the moisture source

The first step is also the most critical – find out where the moisture is coming from. It could be a leaky pipe under the sink, condensation on poorly insulated walls, water seeping in through a foundation crack, or even humidity from daily living that has nowhere to escape. This often requires a thorough inspection, sometimes with moisture meters or infrared cameras, to locate hidden damp spots that aren’t visible to the eye.

Step 2: Repair and dry the area completely

Once you’ve identified the issue, it’s time for full water damage repair. That means fixing leaks, replacing wet insulation, and removing any materials that can’t be salvaged. Simply drying the surface isn’t enough because the area has to be completely moisture-free to prevent mold from returning.

Professional-grade drying equipment, such as dehumidifiers, air movers, and HEPA air filters, can help ensure that no residual dampness lingers. This is one of the most overlooked but essential parts of long-term mold control.

Step 3: Professional mold remediation

If mold has returned more than once, it’s a sign that professional mold remediation is needed. This goes far beyond cleaning with bleach or vinegar. Mold remediation involves isolating the contaminated area, using negative air pressure, and removing or treating affected materials using antimicrobial agents. Professionals will also ensure the air is properly filtered during cleanup so spores aren’t spread to other areas of the house.

Always look for a licensed and certified team with experience handling mold in structures with previous water damage. A good remediation plan will correct the conditions that allowed it to take hold.

Step 4: Improve ventilation and control humidity

Once the mold is gone, prevention is key. That means upgrading bathroom fans, adding ventilation to moisture-prone areas, or installing a whole-home dehumidifier if necessary. Humidity levels should stay below 60% (ideally around 40% to 50%) to prevent mold from thriving again.

You can also add vapor barriers in crawl spaces, seal windows and doors, and reroute drainage outside your home to keep moisture where it belongs.

Step 5: Monitor and maintain

Stopping mold is an ongoing process. Regularly check high-risk areas like basements, attics, behind appliances, and under sinks. Keep an eye out for musty smells, condensation, or discoloration. Even with proper repairs and remediation, mold can return if conditions slip back into its favor.

Preventative maintenance is your long-term defense. Consider having a professional inspection once a year, especially if your home has a history of water damage.

How to get rid of mold if it keeps coming back

Who are the go-to experts for water damage repair in Carmel Valley & beyond?

Mold doesn’t wait – and neither do we. As a full-service restoration team, Risk Free Serv offers comprehensive solutions that go beyond surface-level fixes. From moisture detection and full structural drying to certified mold remediation, we handle the entire process with precision and care. 

Our 24/7 emergency response ensures that when timing matters most, we’re already on the way. Whether it’s a recurring mold issue in your property near Carmel Valley Restoration Center or an urgent water damage emergency in another part of the city, we’re here to restore your home and peace of mind.

Unexpected Places Mold Can Grow in Your Home

Most people think they know what mold looks like – creeping up shower tiles, darkening basement walls, or lingering behind the washing machine. But mold doesn’t always show up where you expect it. In fact, some of the worst infestations start in places you’d never think to check like inside air vents, behind wallpaper, even tucked away in forgotten closets. 

Before you reach out to professionals for water damage restoration in Carmel Valley, it helps to understand where mold hides – and how to spot it early.

Where is mold found in houses?

While the usual suspects get all the attention, mold often thrives in lesser-known places – quiet corners of your home that rarely get inspected. These spots can harbor moisture from past leaks, condensation, or just poor ventilation, all without raising immediate red flags. The good news? Once you know what to look for, you can start identifying these problem areas before they spiral out of control.

1. Inside HVAC systems and air ducts

Your HVAC system circulates air throughout your home, but it can also spread mold spores if it’s contaminated. Mold can grow inside ducts, especially if there’s excess humidity, condensation, or a clogged drain pan. Since ducts are dark, narrow, and rarely inspected, mold can linger for months unnoticed.

You may first catch a whiff of it when the system kicks on – a musty odor that seems stronger in certain rooms. In more serious cases, you may even see dust that looks slightly discolored around vents. Regular maintenance and professional duct cleaning can help prevent this, especially in older homes or systems that haven’t been serviced in years.

2. Behind wallpaper or wall art

Wallpaper is a perfect hiding spot for mold, especially in bathrooms or kitchens where steam is common. The paper traps moisture between itself and the wall, creating a moist environment that mold loves. Even rooms that seem dry can harbor mold if the wall was ever exposed to leaks or high humidity.

The tricky part is that mold behind wallpaper usually isn’t visible until it’s too late. Bubbling wallpaper, slight discoloration, or a strange smell can be your only clues. If you’re planning to redecorate or paint, it’s worth peeling back a corner in suspect areas to check what’s happening underneath.

3. Underneath flooring and carpeting

Hardwood, laminate, and especially carpet can conceal mold after even minor water exposure. A small spill or unnoticed leak from a nearby pipe can seep under the surface and soak into the subfloor, creating a hidden breeding ground.

You might not notice anything until you walk across the area and feel a slight squish or sag, or you catch a musty smell that cleaning just doesn’t get rid of. If flooring feels warped or carpets seem to attract moisture, it’s worth lifting a section to take a look. Mold under floors is especially important to address early, since it can weaken structural integrity over time.

4. Inside cabinets and under sinks

Bathrooms and kitchens are known mold zones, but the interiors of cabinets and the space under your sink often get overlooked. These areas are typically dark and poorly ventilated, which means even a small plumbing drip can become a long-term issue.

If you store cleaning supplies, dish soap, or other moisture-trapping items under your sink, check for signs of mold on the cabinet base or walls. Staining, soft wood, or peeling finishes are all signs that water has been sitting there for a while. Where there’s lingering moisture, mold isn’t far behind.

5. Inside closets and storage spaces

Closets might seem safe, but because they’re closed off and often crammed with clothes, boxes, and linens, air doesn’t circulate well. If a closet is placed against an exterior wall, it’s even more vulnerable – temperature differences can cause condensation, especially during the cooler months.

Check the corners and behind stored items for mold or dampness. If you notice that clothes or bags come out smelling musty, that’s a clear signal. Even small preventative steps like opening closet doors regularly or placing moisture absorbers can go a long way in avoiding issues here.

6. Around window frames and sills

Condensation is common on windows, particularly in older homes or areas where the weather fluctuates. When that moisture drips down and sits on sills or gets trapped in the window frame, it creates the perfect environment for mold.

If your windows fog up frequently or if the wood around the frame feels soft or appears discolored, you may have a problem. Mold here often looks like black or green streaks along the seams or corners. Make it a habit to dry condensation and check frames regularly, especially in rooms with high humidity levels like bedrooms or bathrooms.

7. In attics and crawl spaces

These are perhaps the most forgotten parts of the home, but they’re mold magnets, particularly when there’s poor ventilation or a previous roof leak. In attics, insulation can trap moisture, and wood beams or roof decking can absorb it over time. Crawl spaces often experience ground moisture seeping upward, which can go unnoticed for years.

Signs of mold here include dark staining on wood, damp insulation, or even a musty smell that seeps into the rooms above. If your attic has poor airflow or if your crawl space isn’t sealed, both are worth inspecting annually. Installing a dehumidifier or improving airflow can help prevent long-term issues.

reliable professionals for water restoration in Carmel Valley

Where can I find reliable professionals for water restoration in Carmel Valley & the vicinity?

Mold spreads fast and can compromise your home’s structure and air quality if left unchecked. That’s why reacting within the first 24 hours of discovering water damage is so essential. Our team specializes in comprehensive mold remediation, addressing both the visible growth and the underlying moisture issues that caused it. 

As the highest-rated water damage restoration company in Monterey County and beyond, Risk Free Serv moves quickly to identify problem areas, eliminates mold at the source, and implements strategies to stop mold from returning. If you suspect issues in your home, don’t wait – reach out and let us help you protect your space before the damage grows deeper.

How to Deal With Mold on Hardwood Floors

Moisture can easily seep into your hardwood floor and create perfect conditions for mold growth, which can turn into a serious issue because it not only damages the wood but can also pose health risks, especially if you or a family member has allergies or respiratory problems. Mold usually forms when moisture is trapped under or on the wood surface. 

However, what’s important is that you identify the source and look for any signs of water damage around the affected area so you can address the root cause and effectively remove mold from wood floor. While reaching out to reliable experts in Mira Mesa is highly recommended to make sure there’s no trace of mold left behind, today we share effective tips on how to deal with it

How do you tell the difference between water damage and mold on hardwood floors?

While water stains don’t always indicate the presence of mold, they can encourage its growth if left unchecked. Here’s what’s important to be aware of:

Appearance

Appearance is often the first clue. Water damage usually causes discoloration, ranging from light spots to dark stains. It can also lead to warping, buckling, or cupping, where the edges of floorboards rise while the center dips. In contrast, mold on wood floor often looks like black, green, or white patches. It can appear fuzzy or powdery and typically spreads in irregular patterns.

Changes in texture

Water-affected wood may feel soft, spongy, or warped, while moldy areas can feel rough or grainy. If the wood is still structurally sound but has unusual spots, mold could very well be the culprit. 

Odor

While water damage tends to bring a musty smell due to trapped moisture, mold usually has a stronger, more pungent, earthy odor. If you notice the smell lingering even after the area dries, it’s a sign that mold could be present.

Identifying hidden moisture

Instead of relying on unreliable DIY mold testing kits—which only tell you what you can already see or smell—the key to protecting your floors is finding the root cause. Professional restoration teams utilize advanced moisture meters to scan your hardwood. If moisture readings are high, it means there is an ongoing water exposure keeping the mold alive. Pinpointing and stopping this water source is the crucial first step before any cleaning or remediation can begin

How to get mold out of wood floor?

It takes a careful approach and detailed cleaning to remove mold from wood floor and protect both the wood and your health. If the affected area is small, you can try tackling it yourself, but for larger infestations, it’s best to call a professional. 

  • Step1 – Protect yourself. Mold spores are harmful when inhaled. That’s why it’s important to wear goggles, gloves, and an N95 mask to protect yourself while cleaning. Make sure you open windows and doors for ventilation.
  • Step 2 – Clean the surface mold. Start by vacuuming the affected area using a vacuum with a HEPA filter to capture mold spores. Next, mix a cleaning solution of one part white vinegar and three parts water. Don’t use bleach as it can damage the finish without fully killing the mold roots.
  • Step 3 – Scrub gently. Use a soft brush or cloth to scrub the moldy area in circular motion. Be thorough but gentle to avoid damaging the wood. If the mold still persists, try applying hydrogen peroxide (3%) and let it sit for 10 minutes before scrubbing again. 
  • Step 4 – Sanding. If the mold has penetrated deep into the wood, you may need to lightly sand the area to remove what has seeped beneath the surface. After sanding, wipe the area clean and apply a wood-safe antifungal treatment to prevent regrowth.
  • Step 5 – Dry thoroughly. Mold thrives in moisture, so it’s essential to dry the area completely. Use fans or a dehumidifier to speed up the drying process. 

To prevent it from returning, make sure you fix any issues such as poor ventilation or leaks, regularly inspect for black mold on your wood floor and for signs of water damage, and promptly address any spill. 

What is the best mold killer for hardwood floors?

When it comes to killing mold on hardwood floor, choosing the right cleaner is an essential step to ensure optimal results without damaging the wood. Not all mold killers are safe for hardwood, so it’s important to use products that are both effective and gentle. 

  • White vinegar is a popular, natural option. It’s acidic enough to kill most mold species and is safe for wood when diluted. Mix the aforementioned solution and apply it to the affected area, making sure to let it sit for an hour before wiping it clean. This method works well for surface mold and is non-toxic. 
  • Hydrogen peroxide (3%) is another effective solution. It penetrates the wood’s surface, killing mold spores on contact. Apply it directly to the mold, let it sit for 10 to 15 minutes, use a soft brush to scrub gently. It also helps to lighten any mold stains without causing wood discoloration. 
  • For tougher problems, commercial mold removers designed specifically for wood surfaces are available. Look for products labeled “wood-safe” or “fungicidal”, as these are specially formulated to kill mold without damaging the finish. Always follow the manufacturer’s instructions and test a small area first.

Whichever option you choose, drying the floor thoroughly after treatment is crucial to prevent future mold growth.

How to get mold out of wood floor

Where can I find reliable experts for mold hardwood floor water damage in Mira Mesa & beyond?

Whether you’re looking to minimize water damage on your hardwood floors, you’re curious to learn more about how to identify and address water damage early, or wondering what different types of water damage there are, reach out to Risk Free Serv. With years of experience and a trusted crew of professionals, we’re here to give you the peace of mind you deserve. No matter if you need us in Mira Mesa or across SD, you can count on our experts to deliver exceptional service every time. Get in touch with us today and find out why we’re the best at what we do!